A reliable stay starts with a clear ending. Before asking your dog to remain in position for longer, or while you move farther away, teach exactly what means the stay is over.
My approach is to get the position, add a release cue almost immediately, and then teach the dog that your movements, your conversation, and interesting things in the environment are not release cues. Once that is clear, building distance, duration, and distractions becomes much easier.
The goal is not to catch your dog getting up. It is to arrange the training so that staying is easy to understand and rewarding to do.
What You'll Learn
- Teach a release cue as soon as your dog can hold a position briefly.
- Fade food lures early and reinforce remaining in position as your hand moves away.
- Introduce manageable distractions before gradually combining distance, duration, and environmental activity.
- Use play, sniffing, and other rewarding activities to make staying worthwhile.
Table of Contents
- Step 1: Teach the Positions and a Brief Stay
- Step 2: Teach the Release Cue and Make Its Meaning Clear
- Step 3: Build Distance, Duration, and Variety
- Why Teaching the Release Early Helps
Step 1: Teach the Positions and a Brief Stay
You can get a sit, down, or stand through capturing, free shaping, or luring. Capturing means reinforcing a position your dog offers naturally. Free shaping means reinforcing small steps toward the finished behavior. Here, I will explain luring with food.
I like to keep the food and clicker in my right hand and lure with my left. I am left-handed, and my eventual hand signals will also use that hand. You can organize your hands differently. What matters is that you can mark the movement clearly and deliver the food smoothly.
First, get your dog interested in following a treat. Work somewhere quiet enough for the dog to concentrate, with food the dog actually wants.
Teach position changes without creeping forward
For stays, I like to teach the dog to keep the two back feet in the same location when changing positions. During a stand-to-down or down-to-stand transition, I aim for all four feet to remain in place.
This foundation is useful later when you ask for position changes at a distance. Instead of gradually coming toward you with each change, the dog understands that the back feet stay planted.
Practicing several positions also adds variety. You are not limited to repeating a down over and over.
- Stand to down: Start with the treat near the dog's nose and reinforce standing with the feet still. Move the treat diagonally backward and downward, toward the dog's space. Click the first small movements toward folding into a down, then build toward the complete position. Moving the treat straight down can produce a bow instead.
- Down to stand: Reverse that diagonal movement, lifting the treat upward and forward. Mark the dog beginning to rise, then refine the movement so the feet stay in place.
- Stand to sit: Move the treat backward so the dog steps the front feet back into a sit while the back feet remain planted.
- Sit to stand: Draw the treat forward so the front feet step forward and the dog rises without moving the back feet.
- Sit to down: Move the treat downward and slightly forward. Some dogs will lie down if you simply bring the treat to the ground.
- Down to sit: Lift the treat diagonally upward over the dog's head so the dog pushes back into a sit.
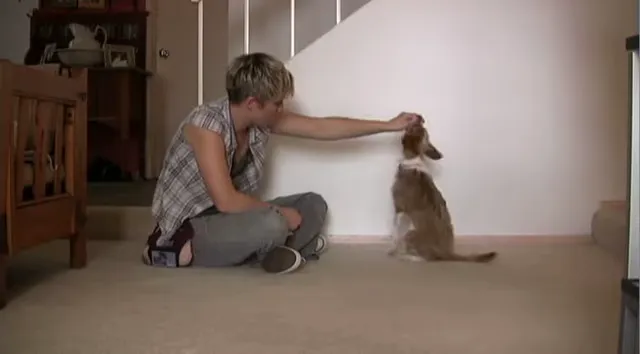
If your dog moves the feet a lot initially, do not try to perfect everything at once. Click the small muscle movements toward the position first. Once the dog can move up and down, become more selective about foot placement.
If the dog is struggling to lie down, slow the lure and reinforce approximations, such as a slight lowering of the body. You do not have to wait for the complete down before giving useful feedback.
If luring is not working, it is not the dog's fault. Check your hand movement, the value of the food, and the distractions around you. A busy puppy class can be a particularly difficult place to teach a completely new behavior because there is so much competing for the puppy's attention.
Build fluent movement before adding words
Once your dog moves readily between positions with the lure, you can occasionally ask for a short sequence before clicking. For example, guide a down, stand, down, sit, and stand, then mark and reward.
At this stage, you are practicing how you want the dog to move. You do not need to add verbal cues yet. Establish the movement first rather than attaching words to a behavior the dog is still trying to figure out.
Fade the food lure immediately
As soon as your dog understands the movement, take the food out of the guiding hand.
- Hold your empty hand as though it contains a treat.
- Make the same movement you used with food.
- Click the dog for following the empty hand into position.
- Get a treat from your other hand and reward.
You can deliver the reward with either hand. I often transfer the food to the hand I used for luring because it is easier than juggling food and a clicker in the other hand.
The important distinction is that the food no longer has to be visible for the dog to respond. Removing the lure does not mean removing the reward.
Remove your hand while the dog stays in position
Do not leave your hand at the dog's nose or on the floor for every repetition. Some dogs learn that the hand must remain there, then get up the moment it moves away.
Start preventing that habit right away. Guide the dog into a down with your empty hand, withdraw your hand, and click as you withdraw it while the dog remains down. Gradually leave your hand away for slightly longer periods.
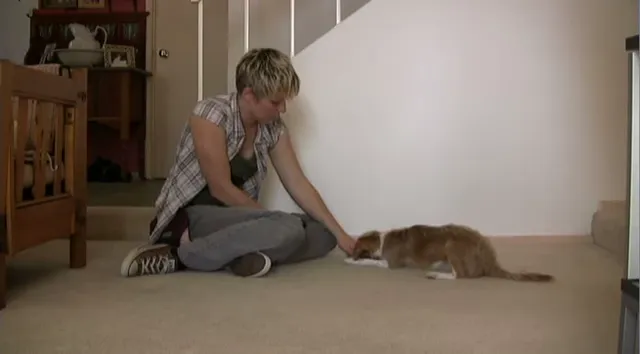
As soon as the dog can remain in position for a couple of seconds after your hand disappears, you have enough foundation to begin teaching the release cue. You do not need a long stay first.
Turn the lure into a clear hand signal
Gradually make the guiding movement look more like the visual cue you want to use. Begin with a movement your dog recognizes, then make small changes in how far your hand travels and how upright you are.
A hand signal given while you sit on the floor can look dramatically different when you stand up, especially to a small dog. Work through those changes rather than assuming the dog understands them automatically.
If you keep making every repetition harder, the dog may become frustrated. Return to an easier version whenever needed. A familiar empty-hand signal is also useful later if the dog becomes confused.
Another way to help with a change in your posture is to make the behavior predictable first. Practice several successful repetitions while seated or kneeling, perhaps about ten, then try it standing. That repetition can make the next response easier to offer. It also illustrates why a cue's meaning is learned: even an unusual word such as “hamster” can become associated with lying down.
Film your own training occasionally. It is much easier to notice inconsistent or sloppy hand signals when you can review what your hands and body are actually doing.
Step 2: Teach the Release Cue and Make Its Meaning Clear
The release is a behavior worth teaching, not just something you say when you have finished handing out treats.
I like words such as “free” or “release” because they are less likely to slip into everyday conversation than “okay.” Choose a word you can use consistently.
- Have your dog remain briefly in a sit, down, or stand.
- Say the release word while the dog is still in position.
- After saying the word, move to encourage the dog to get up and come toward you.
- Click as the dog gets up, then reward.
Say the word first, then move. If your movement happens before or at the same time as the word, the dog may learn to respond to your body instead.
In this exercise, I teach the release to mean getting out of the position and coming toward me. A dog who remains completely still after the release needs help learning that part too. We want a clear response to both the position cue and its ending.
What stimulus control means
Putting the release cue under stimulus control means teaching four things:
- The dog gets up promptly when released.
- The dog does not leave the stay without being released.
- Unrelated words, movements, and environmental events do not act as release cues.
- The release word produces the intended response, rather than some other behavior.
That clarity is what allows you to move, speak, handle food, or pick up toys without accidentally ending the stay.
Click as easy distractions happen
Begin with very small distractions. Move one foot, shift your weight, raise an arm, or say an unrelated word. Initially, click at the moment the distraction happens, while your dog is still in position, and feed the dog there.
You are teaching that things the dog might interpret as “get up” are actually opportunities to remain in position and earn reinforcement.
For example, words such as “apples” and “cabbages,” a conversational greeting, or a small movement away from the dog should not end the stay. Only the release word does that.
As your dog becomes successful, let the distraction happen before you click. Later, combine a few familiar distractions and mark the dog for remaining through the more difficult part.
Progress can be very small. If stepping over your dog would be difficult, begin by standing near the dog's back. Reinforce that first. Then work toward a slow partial step, feeding while you move if needed, rather than attempting the whole action immediately.
Add food and toy distractions gradually
A food bag moving near you can become part of the same exercise. Start with a small movement and click as the bag moves. Later, wait briefly after the movement before marking the stay.
I do not consider constant eye contact necessary for this behavior. The dog can remain in position without looking at me, and eventually there may be times when I am not visible at all.
With toys, choose your starting point according to the dog. For a dog who finds toys irresistible, even holding a favorite toy may be too much. Begin with a boring object instead.
A useful progression is:
- Reinforce staying while an object or toy is simply present.
- Touch the toy and reinforce staying.
- Move it a tiny amount.
- Build toward larger movements and, eventually, throwing it.
- Introduce additional challenges, such as a squeak, at a level the dog can manage.
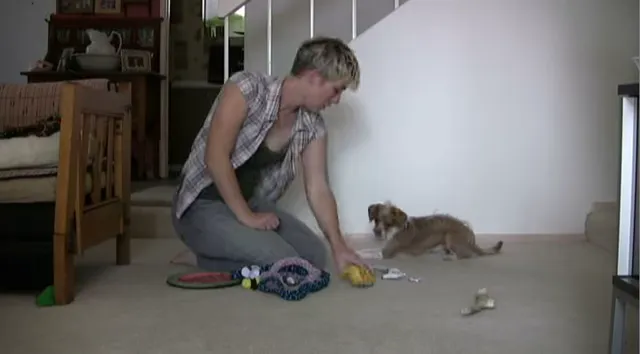
If your dog can reach a distraction faster than you can, a leash attached to a harness and secured to something stable can help keep that distraction out of reach. This prevents getting up and grabbing the toy from becoming its own reward. The training should still be easy enough that the dog can succeed.
What to do if your dog gets up
Calmly guide the dog back to the same location and position with a lure. With a more experienced dog, you may simply be able to repeat the hand signal or verbal cue.
Do not give a treat just for returning to position after breaking the stay. Instead, reset, make the distraction easier, and reinforce the next successful stay. Guide with the treat rather than physically forcing the dog into position.
If you accidentally click as the dog starts to get up, try to deliver the promised food with the dog back in the intended position. Avoid making that your usual training pattern by lowering the difficulty.
Repeated breaks are information that the exercise is too hard. Go back to a level where the dog can remain successful instead of repeating the same challenge and hoping for a different result.
Proof the stay without making it unfair
Be creative about the movements, sounds, food, toys, and activity your dog learns to stay around. But reliability does not mean expecting a dog to endure something stressful.
If a loose dog approaches, children rush into the dog's space, or another situation becomes unfair, release your dog and move away. Protecting the dog's comfort matters more than completing a training repetition.
Step 3: Build Distance, Duration, and Variety
Once the release cue is clear and your dog can remain through manageable distractions, start combining the three main challenges of stay training:
- Distance: How far you move from the dog.
- Duration: How long the dog remains in position.
- Distractions: What happens while the dog stays.
Keep the combinations achievable. If the dog starts getting up, simplify the setup and return to successful practice.
For longer periods, a down is usually the most comfortable position. During outdoor training, use a harness and long line so that leaving the stay does not lead to an unplanned reward, such as running off to investigate something interesting.
Vary when and how you reinforce
As the behavior develops, avoid making the reward or release completely predictable. Sometimes reinforce a short stay. Sometimes ask for a longer one. Release your dog while standing beside the dog as well as from different distances.
Vary the rewards too:
- Return and deliver a treat in position.
- Release the dog to run toward you and play tug.
- Return, release the dog, and continue a walk.
- Give permission to sniff or investigate the environment.
- Use appropriate access to people or other dogs when that is rewarding for your dog.
The release should not always predict the same activity. Your dog might get to play, eat, walk, or sniff, while the meaning of the release word stays consistent.
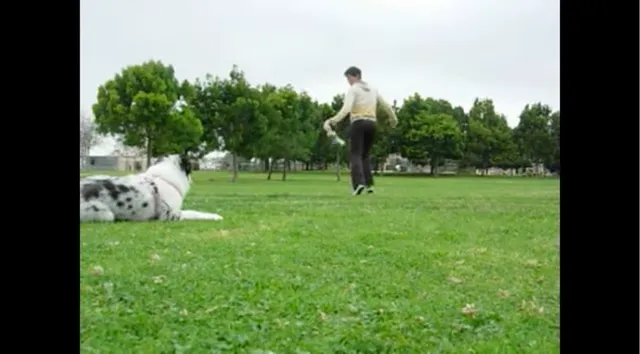
I used this combination of distance, distraction, and duration with my border collie when she was a 13-week-old puppy. She could not predict whether I would return with a treat, release her to chase me for a tug game, or come back and release her to continue walking and sniff the bushes.
The useful lesson is not that every puppy should meet the same standard at the same age. It is that a clear release gives you a strong foundation for adding those different possibilities.
Why Teaching the Release Early Helps
This method brings several learning principles together, while keeping the practical training simple.
You teach the ending before building the whole stay
Teaching the release early uses back chaining: establishing the end of the sequence before making the preceding behavior more demanding. Instead of building a long stay with an unclear finish, you teach the dog what completes it, then expand what comes before.
Distractions can predict good things
Clicking and rewarding as manageable distractions happen does more than reinforce stillness. Through classical conditioning, those distractions can become associated with good outcomes, helping the dog feel calmer around them rather than treating them only as temptations to resist.
Getting to do something fun reinforces staying
The Premack principle explains how access to a more likely or preferred activity can reinforce another behavior. Here, staying leads to permission to get up and do something the dog wants, such as playing or sniffing.
Because getting up on the release cue is itself taught with reinforcement, the release can also acquire reinforcing value. Ending a stay can become part of what rewards the stay.
A wonderful stay is not just about remaining still. It is about understanding when to remain, when to move, and how rewarding both can be. Build that understanding in small, successful steps, and stay training can be an enjoyable part of your time together.


