Lying on their side is a useful behavior for grooming and veterinary examinations, and it’s also a fun trick to teach. The movement is similar to the beginning of roll over or play dead, but here the goal is for your dog to stay comfortably on their side with their head resting on the ground.
I like to break this behavior into three small pieces: roll onto one hip, tuck the supporting elbow, and put the head down. You can reinforce each piece separately rather than asking your dog to do the whole movement at once.
Start With a Comfortable Surface
Practice on a padded, nonslip surface. Comfort is important for this behavior, especially for dogs who feel unsure about shifting their weight onto their hip or shoulder.
A padded mat is useful beyond the initial training, too. If your dog needs to lie on their side for an examination at the vet, you can bring the mat along so they have somewhere comfortable to settle. With practice, the mat can also become part of the cue for the behavior.
Have treats ready and use a marker word, such as “good” or “yes,” or a clicker to mark the movement you want. Then give your dog a treat. This lets you reinforce the little steps along the way.
Step 1: Lure Your Dog Onto One Hip
Begin with your dog lying down in a normal down position. Use a treat to guide their head around toward one shoulder, away from facing straight ahead. As they follow the lure, look for their hindquarters to shift so they roll onto one hip.
Mark that hip shift and give a treat. You are not looking for the finished side-lying position yet. Moving out of the square down and onto one hip is the first successful step.
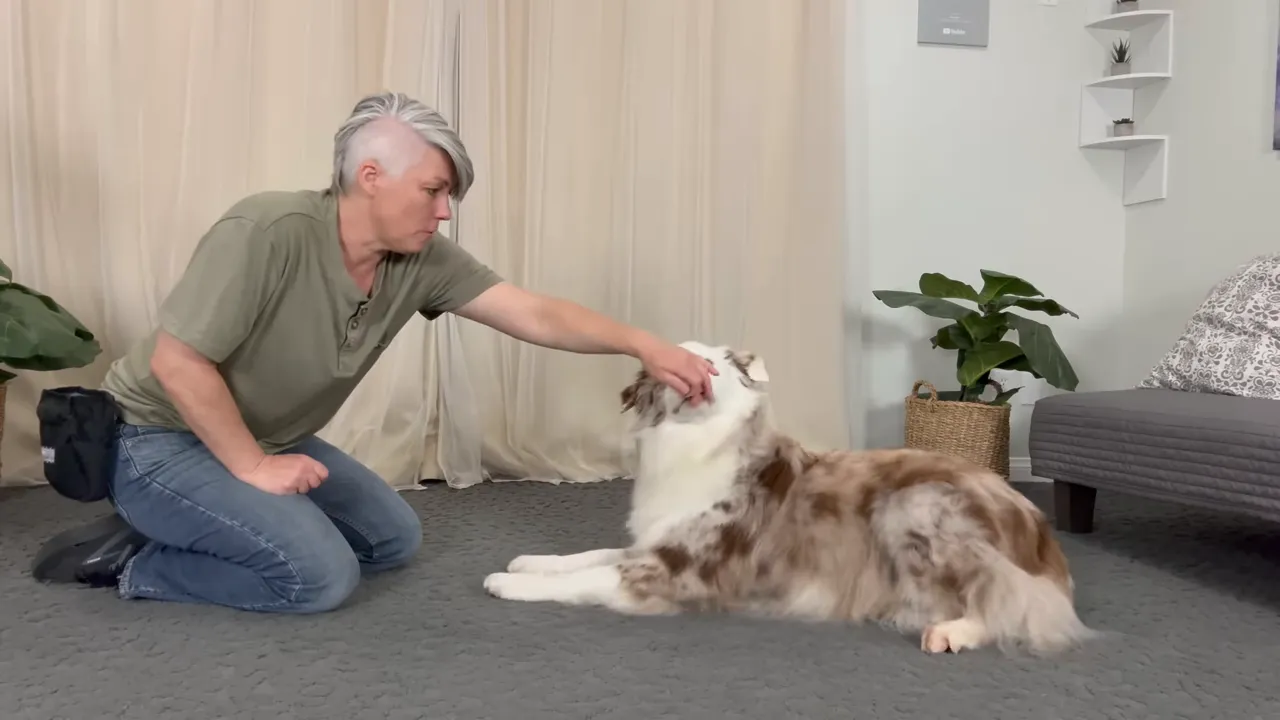
At this stage, many dogs keep a front elbow out underneath them to support their body. That’s perfectly normal. Helping them tuck that elbow is the next part.
Step 2: Encourage the Elbow Tuck
Once your dog can shift onto their hip, move the treat so their head goes up and back. Following that movement can encourage them to tuck the supporting elbow underneath and lower their shoulder onto the surface.
You are guiding the movement with the food lure, not physically pushing your dog onto their side. Mark and reinforce the elbow tuck or shoulder movement as your dog offers it.
This can be very easy for some dogs and much more difficult for others. If your dog seems uncomfortable or keeps propping themselves up, make the setup more comfortable rather than trying to get the whole behavior immediately. The blanket setup below can be especially helpful.
Step 3: Reinforce the Head Resting Down
With your dog’s hip and shoulder down, bring the treat low in front of their nose to encourage their head to rest on the ground. Mark and reinforce that position.
The full sequence is:
- Guide your dog into a down.
- Lure their head around so they roll onto one hip.
- Move the lure up and back to encourage the elbow tuck.
- Bring the lure down so their head rests on the surface.
Use as many treats as your dog needs. A dog who is just learning might earn a treat for the down, another for the hip shift, another for tucking the elbow, and another for resting their head. There’s no need to save all the reinforcement for the finished position.
Give your dog time to finish eating before you lure the next movement.
Build Duration and Add a Release Cue
Once your dog is on their side with their head down, begin teaching them to stay there while your treat hand moves away.
Start with your hand low in front of their nose. Move it away briefly, then bring it back to deliver a treat while their head is still resting down. Repeat this to build duration in the position.
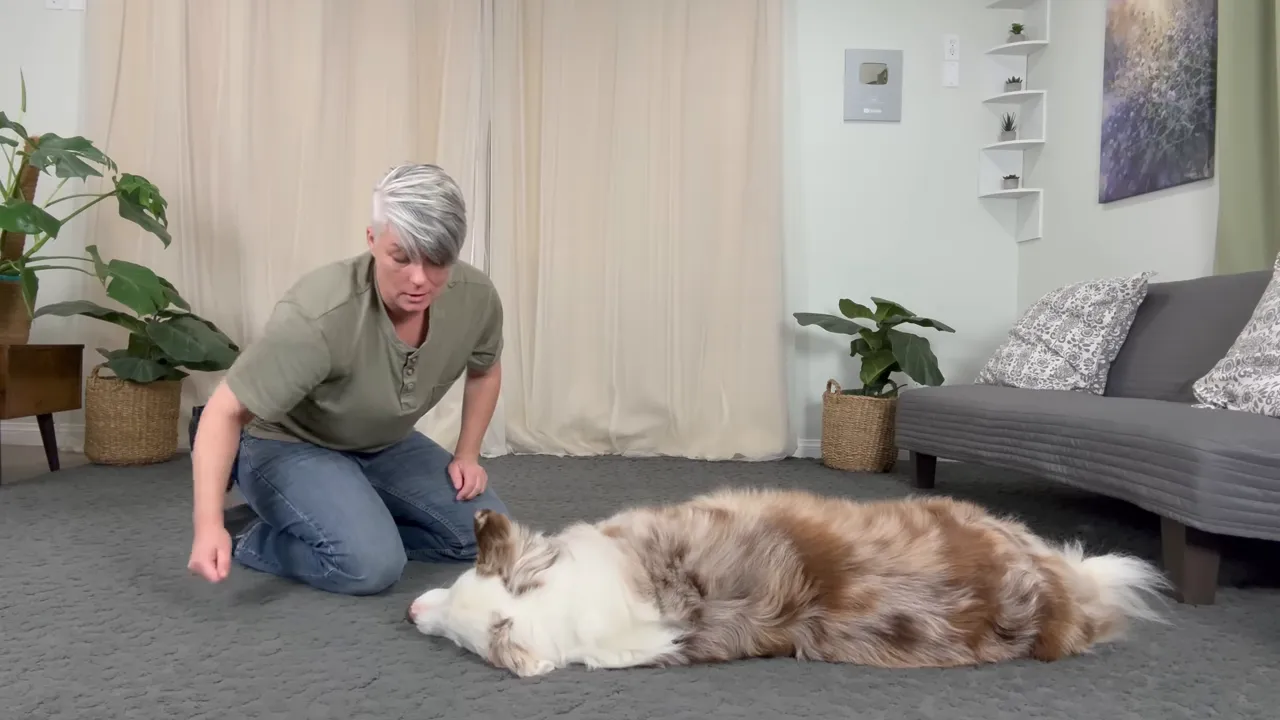
- If the head stays down: mark and return the treat to floor level.
- If the head lifts: bring your hand back down to guide the head into position again.
Add a release cue, such as “free,” to tell your dog they can get up. This makes the end of the behavior clear rather than leaving your dog to guess how long to stay. You can reinforce the release as well.
Add “On Your Side” and Practice Both Sides
To introduce a verbal cue, say “on your side” before you move your hand, then lure your dog through the familiar movement. The order matters: the words come first, followed by the help your dog already understands.
I suggest teaching this behavior on both sides. Release your dog, help them back into a down, and repeat the same small steps in the other direction. Reinforce the hip shift, elbow tuck, and head-down position on that side, too.
You can also use a phrase such as “on your other side” for the opposite direction. Continue giving your dog as much help and reinforcement as they need while learning each side.
If Your Dog Struggles, Try a Bunched Blanket
For dogs who are reluctant to roll onto their hip or tuck their elbow, try a soft blanket or duvet bunched up so it has a dip in the middle. That shape can make the weight shift easier and more comfortable than a firm, flat surface.
With my Chihuahua, Epic, this setup makes it easy to lure the hip shift and elbow tuck. Start with the comfortable blanket or towel, then progress toward a flatter surface as your dog becomes comfortable. Keep padding and traction in mind throughout.
Let Your Dog Rest a Paw on Your Hand
Some dogs also feel more comfortable if they can put a front paw on your hand during the movement. Letting them make that contact can help them tuck the elbow and move onto their side.
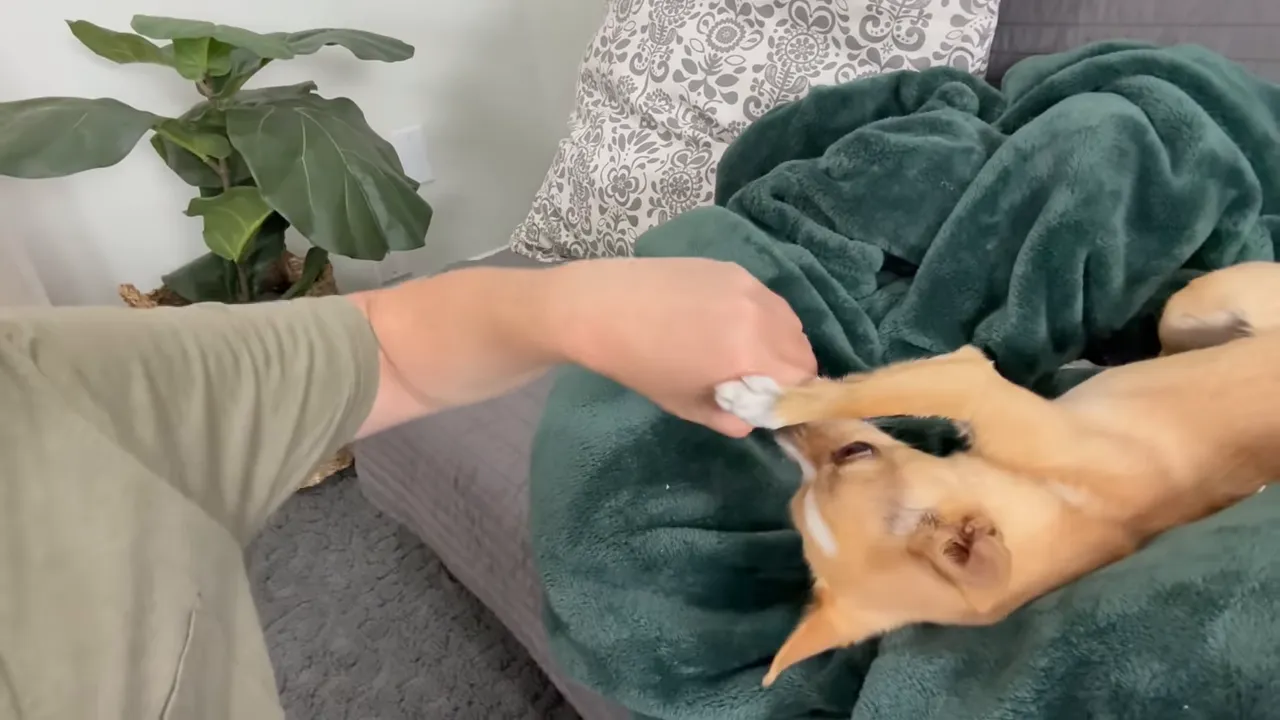
Let your dog place their paw there rather than pulling them over by the leg. The hand is simply an extra point of contact while they follow the lure.
The aim is a comfortable behavior your dog understands, not just a finished pose. Reinforcing the small movements gives you a way to work toward that goal at your dog’s pace, using a reward-based training approach.
For related skills, you can work on an upside-down settle for grooming or teach your dog to roll over. For “on your side,” keep returning to the same simple foundation: a comfortable surface, small reinforced steps, and a clear release.


